Shadowrocket
Import, Connect, and Verify
Follow five steps: add your existing details, decide how requests should be handled, connect, and check the results. Complete the process once before adjusting rules or automatic connection conditions.
Screenshots show the official App Store interface. Look for the named fields to find each option; their locations may change slightly with app updates.
Add Server and subscription import
A subscription link, a single share link, and manually entered details are different types of information. Identify what you have before choosing the appropriate option.
Open Add Server from Home
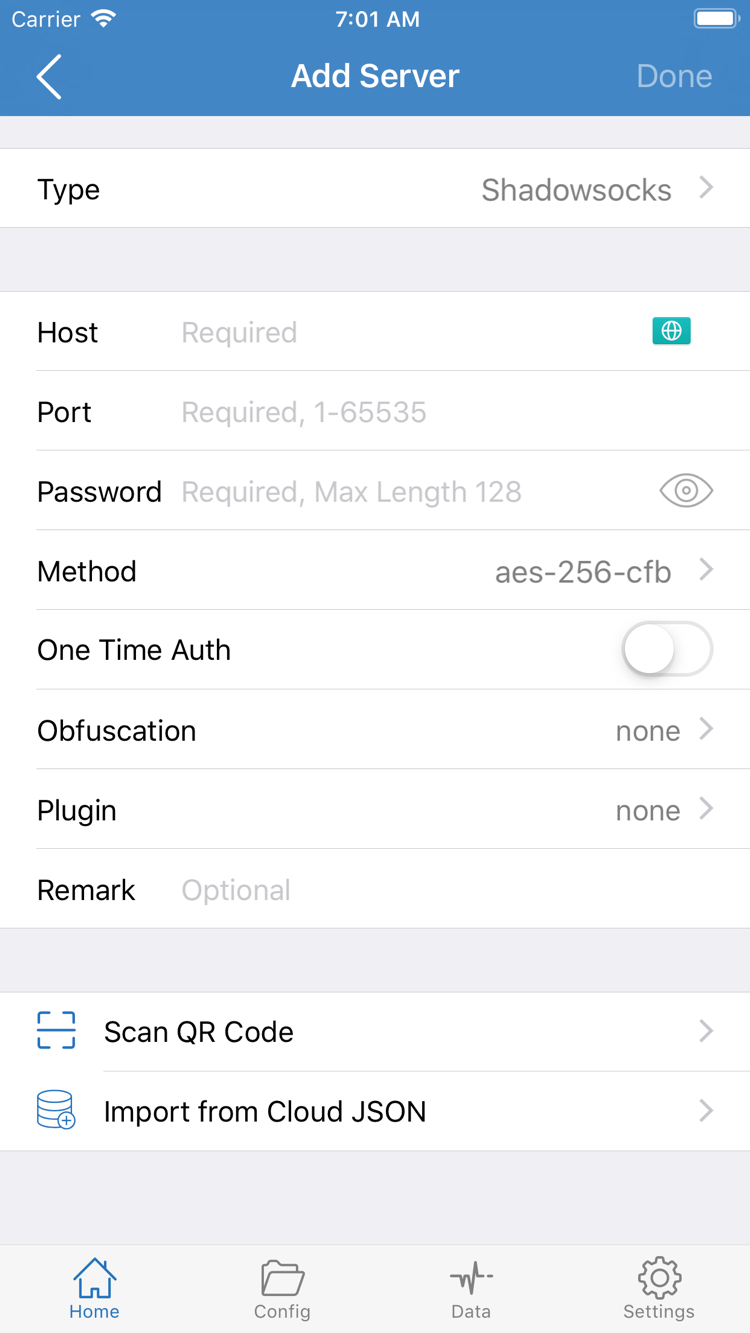
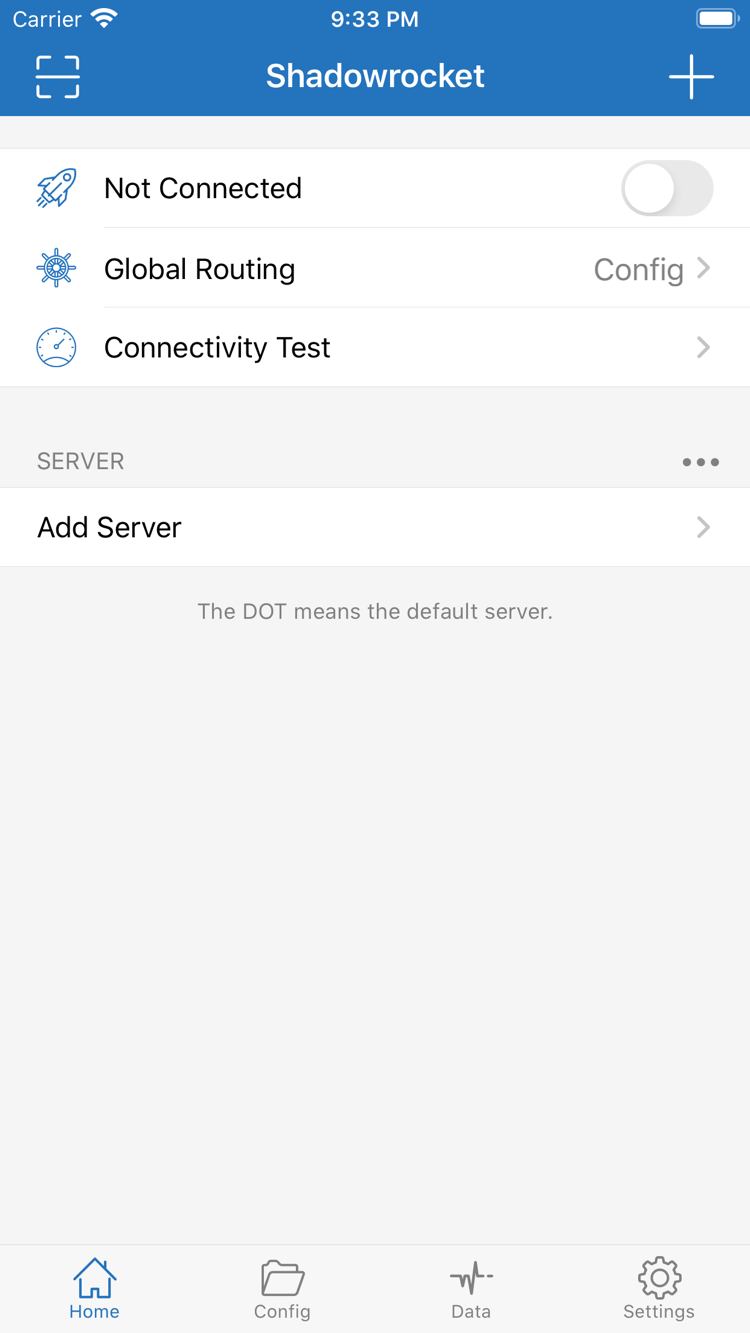
Open Shadowrocket and stay on Home. When using it for the first time, the SERVER group may not contain a usable entry. This does not mean the installation failed. Tap Add Server to open the add screen. Check Type first, then decide what to enter. Do not copy every field shown in a screenshot: the fields below change with Type, so use the protocol type specified by your existing details.
If you have details for a single server, select its protocol under Type, such as Shadowsocks, VMess, VLESS, or Trojan, then enter the address, port, and authentication details. The official screenshot shows a form with Type, Host, Port, Password, and Method. Method applies to the relevant protocols; other protocols may use different authentication fields. Enter only the hostname or address required by your details in Host, and the port number in Port. Do not add a webpage path to the address or combine multiple values in one field.
Choose Subscribe for an existing subscription link
If you have a subscription link used to update a server list, choose Subscribe under Type in Add Server. Enter the complete link in URL, add a recognizable note, and save it. Subscription addresses often have long query parameters. When copying, keep the entire link from beginning to end, without chat text, leading or trailing spaces, or line breaks. A subscription link may contain access credentials, so treat it like a password and do not post it in public comments or screenshots.
After saving, return to Home and wait for the subscription content to load. Then check whether selectable servers appear under SERVER. Saving a subscription source and successfully retrieving its entries are two separate things. If you see only the source name and no usable entries, first check whether the link updates correctly and the details are still valid. This imports server details; it does not select a configuration file with rules. Do not confuse a configuration subscription on the Config page with a server subscription.
Using QR codes and clipboard details
If you have a server QR code, use Scan QR Code on the add screen. Allow camera access, scan the code, then check the detected protocol and address. For a single share link, use the clipboard import option provided by the app. If the system asks for permission to paste, check the source before proceeding. Import from Cloud JSON is for the relevant JSON details; it is not a universal option for all subscription links. Check the fields after importing before turning on the connection.
This step is complete when Home shows a server entry with a clear source that you can select. Avoid importing the same details repeatedly while trying different options, or you may select an outdated entry later. If you need to distinguish Subscribe, configuration files, and share links, see the quick reference, then continue to choose a routing method.
Three Global Routing modes
The server determines which destinations can be reached; Global Routing determines how requests are handled. Check them separately.
Return to Home and tap Global Routing to view the current selection. The three modes are Config, Proxy, and Direct. Config handles requests according to the rules in the current configuration; Proxy handles requests within the app's scope using a proxy; Direct handles them directly. These mode names are not connection quality ratings, and the first option is not necessarily best for every network. Choose based on what you want to test.
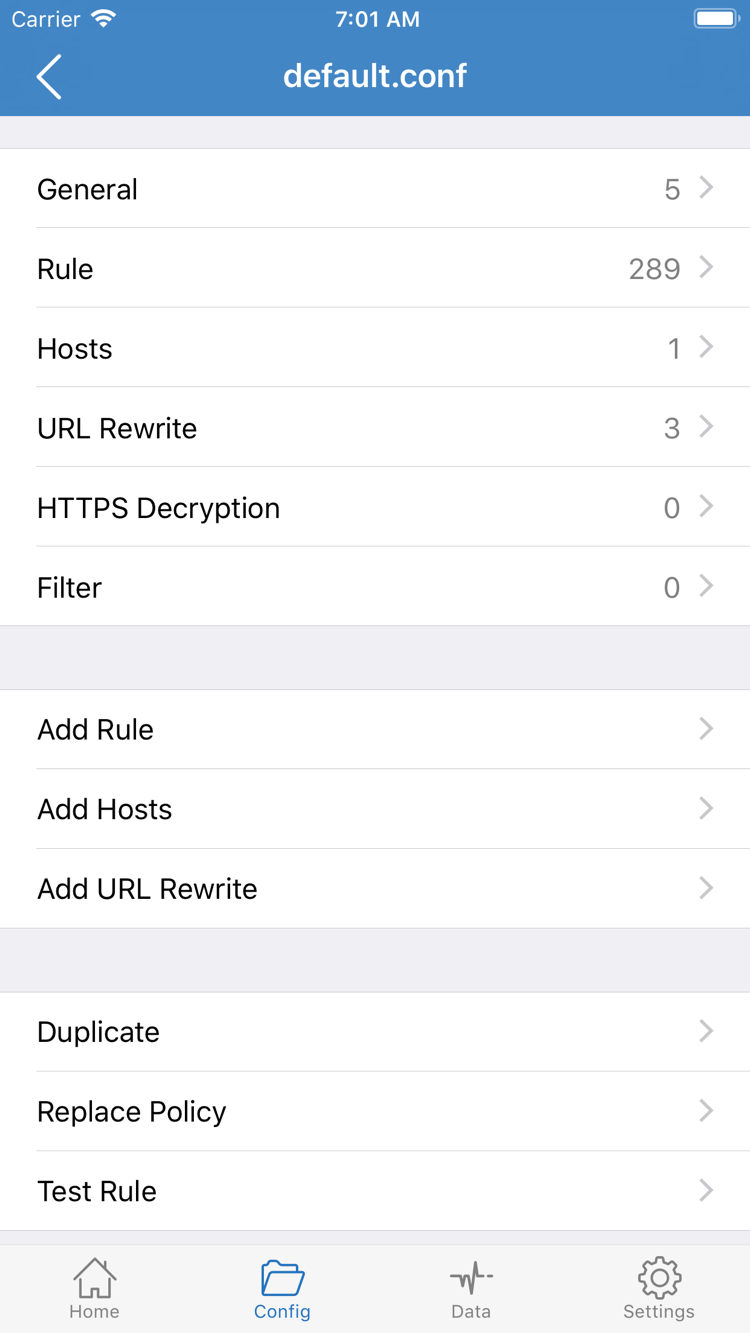
For rule-based routing, choose Config, then open the Config page and check which configuration file is active. Successfully importing a server does not mean the rules meet your needs. Open the file you plan to use and review its sections, which may include General, Rule, Hosts, URL Rewrite, and HTTPS Decryption. When getting started, check Rule and the final policy; you do not need to enable or modify every section just to connect.
Understand the rules before editing the configuration
Rules are usually matched in order, and an earlier match can affect how later requests are handled. The following manual example illustrates the syntax; it is not a complete file to replace your existing configuration with: DOMAIN-SUFFIX matches a domain suffix, DIRECT means a direct policy, PROXY is the proxy policy used in this example, and FINAL handles requests that do not match an earlier rule.
DOMAIN-SUFFIX,example.com,PROXY
IP-CIDR,192.168.0.0/16,DIRECT
FINAL,PROXY
Before using Add Rule on the edit screen, save a copy of the configuration and check that the policy names in the rules correspond to actual policies in the current configuration. Do not assume that every configuration uses the same policy structure just because the example contains PROXY. After making changes, save and return to the Config list to check that the intended file is active. Opening a file in the editor does not switch the active configuration.
If you cannot yet tell whether the issue is with the server or the rules, you can briefly use Proxy for comparison during the verification step, record the result, then restore Config. Direct can help compare access through the local network, but it does not prove that the server connection works. For explanations of rule keywords, see the Global Routing quick reference. For protocol parameters and trade-offs, see protocol details. For this step, identify the current mode and configuration; there is no need to adjust every rule at once.
Select a SERVER entry and turn on the connection
Confirm which entry is selected before turning on the switch at the top. System authorization and server authentication are separate steps.
Return to Home and select the server you just checked in the SERVER group. If several entries have similar names, open their details to confirm the address or note rather than relying on their order in the list. Then check Global Routing again: use Config for rules, and switch to Proxy or Direct only for a planned comparison test. This makes it possible to identify which conditions were in use if the results differ.
When ready, turn on the connection switch at the top of Home. The first connection may prompt the system to authorize adding a VPN configuration. Confirm that Shadowrocket initiated the prompt, allow it, and complete device verification as requested by the system. This permission lets the app create a system network connection configuration; it does not purchase a server or submit your details to this site. If you cancelled permission, start the connection again and follow the system prompt rather than importing the subscription again.
Wait for the connection status to change. Not Connected in the screenshot means that the app was not connected when the screenshot was taken; it is not a setting to enter. After turning on the switch, check whether it stays on or quickly returns to its previous state. A VPN status in the system only indicates that the relevant connection configuration is active. By itself, it does not prove that server authentication, access to a destination, and rule matching all succeeded. Verify them in the next step.
If the switch turns off immediately, note the error message on screen and check whether another VPN connection configuration is running. Avoid switching repeatedly between network configurations without recording the results. If necessary, stop the other connection before trying Shadowrocket again. If the switch stays on but webpages do not open, keep the current settings and continue to the next step; do not change the server, configuration file, and test method all at once.
Connectivity Test and verification
Check the test result, actual access, and routing path in that order. Do not treat a single test as a complete conclusion.
Keep the connection on, tap Connectivity Test on Home, and wait for the result. The test can help identify connectivity under its current method, but it covers only the relevant test target and conditions. A response does not mean that every webpage is accessible; a timeout does not necessarily mean that no apps can work. Record the result, then verify in the browser or app you actually plan to use.
Choose a page with a clear purpose that is currently available, and make a new request rather than relying on an old, already loaded page. Refresh the page or open a new tab if needed to avoid misleading results from cached content. Then check whether the app you want to use can complete a full operation, such as loading new content. Seeing the app's home screen alone is not enough to judge how new requests are handled.
With Config, check both types of requests separately
If the configuration includes both proxy and direct policies, test one destination for each expected use. Opening a destination expected to go direct does not prove that the proxy server works; accessing a destination through a proxy does not mean direct access to local networks is configured correctly. Check the current rules to see whether the destination matches the expected rule, and review the available connection records or diagnostic information if needed. Do not infer the routing path from webpage loading speed alone.
If results differ, keep the server and test target unchanged, and switch Global Routing once for comparison. For example, if Config fails but Proxy succeeds, check the rules, policy selection, and related resolution settings first. If both modes fail, check the server fields, whether the details are still valid, and the current network. When testing is complete, restore the intended mode and verify again so that a temporary troubleshooting setting is not mistaken for your everyday configuration.
By the end of this step, you should be able to answer three questions: does the connection switch stay on, can the specified destination complete a new request, and does the expected routing in Config work? If only one of these is true, use the next step to locate the issue. See troubleshooting for test methods and common status meanings. There is no need to repeatedly change settings just to get a better-looking test number.
Common issues and Settings checks
Identify where the failure occurs before checking related settings. Do not switch every option at once.
Import fails: check the type and completeness of the details
If a subscription cannot be retrieved, first check that the link was copied in full, is still valid, and does not need an updated address from the service provider. A webpage address, single share link, server subscription, and configuration file address are not necessarily interchangeable. If a manual entry does not work, return to Add Server and check Type, Host, Port, and authentication fields. Pay special attention to uppercase and lowercase letters, invisible spaces in passwords, and protocol-specific parameters. If a field is unclear, ask the original provider rather than guessing from its name.
Connection fails: distinguish the local network from remote details
Pause the connection and confirm that the device's basic network can access the internet. If the current Wi-Fi network requires a webpage sign-in, complete it first. Then reconnect with Shadowrocket and test the same entry. If the issue occurs only on one network, compare Wi-Fi and mobile data if available, and record the difference. If it fails on every network, focus on the server details and service status. Reinstalling the app will not correct a wrong port or expired authentication details.
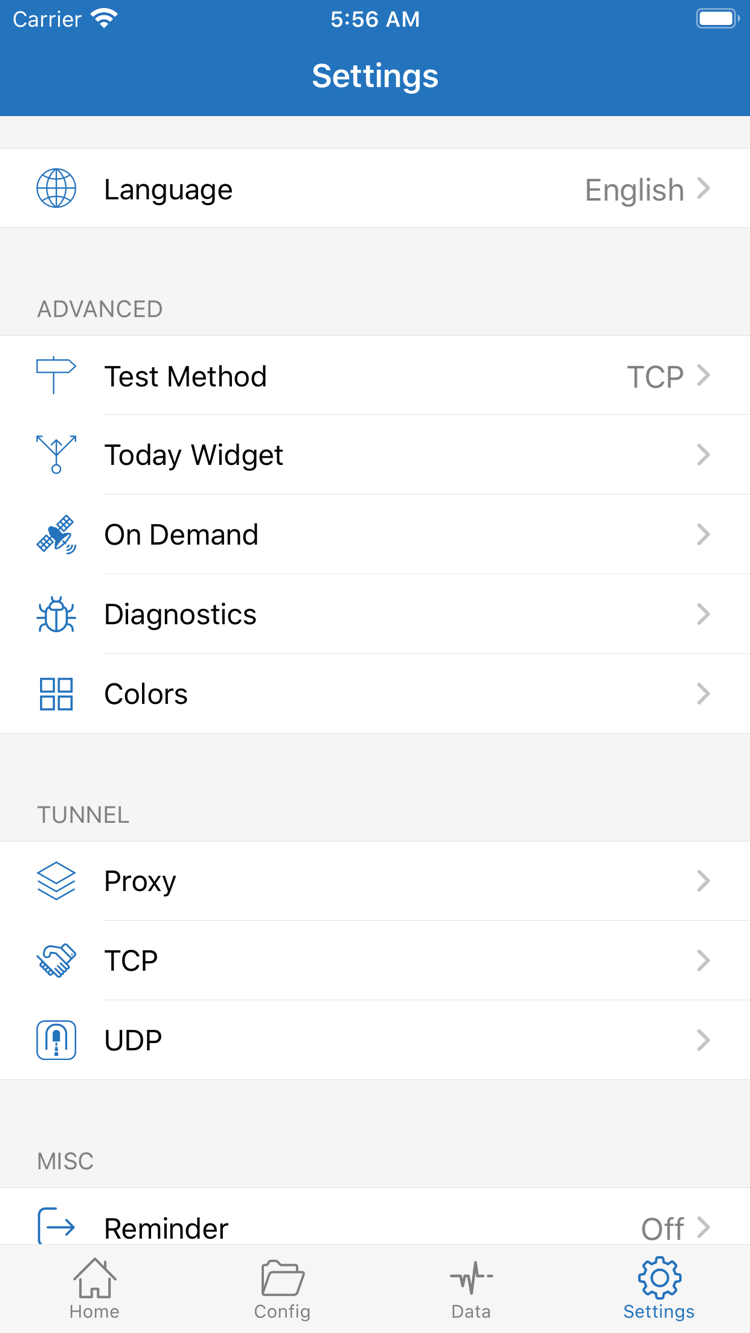
Testing and automatic connections: review Test Method and On Demand
Open Settings, find Test Method, and check whether the current test method suits the issue you are investigating. Different methods use different targets and conditions, so their results are not directly comparable. On Demand in Settings triggers connections based on conditions; it does not fill in missing server details. If the connection starts automatically after you manually turn it off, check the existing On Demand conditions. For initial setup, complete a manual connection test first, then configure automatic connection conditions separately. See the On Demand quick reference for details.
Diagnostics can help with further investigation. When collecting information, keep the error type, step where it occurred, current mode, and network environment. Before sharing a screenshot or record, check for subscription addresses, passwords, or authentication details. Settings also includes items such as Proxy, TCP, and UDP; these are not options that must all be changed whenever an issue occurs. For specific protocol parameter issues, check the relevant fields in protocol details rather than copying settings from another protocol.
If the issue persists, record whether the import succeeded, whether the switch stays on, the Connectivity Test result, what happened during actual access, and the comparison between Config and Proxy. Then look for similar cases in troubleshooting. Keep a copy of the original configuration, change one condition at a time, and decide whether to keep or revert each change after verification. This approach avoids accumulating changes and makes it easier to reuse the same checks when updating details later.